Multisig Accounts
You can use a multisig account to add extra security layers from a basic wallet. The main purpose is to require multiple signatures to authorize a transaction or any change.
Overview to use a multisig account
- Create two or more accounts - Using the Wallet Generator
- Generate a multisig account from these accounts by specify the threshold
- Send some xx coins on each account
- Do any transaction
- Sign with required amount of accounts for authorize action
Before Starting
Multisig account costs a lot of fee for every actions so this security feature isn't cheap. The main purpose is to store these accounts keys or .json files on different location like that even if you lost one you can recover your account from another key by using a threshold X-1 wallet.
Example : you create three accounts but you need only two for sign and authorize a transaction. If you not do that and specify all account with the threshold number you need all accounts for authorize anything if you lost one account your multisig account is lost forever.
If you don't do this and specify all accounts on the threshold number you need all accounts for authorize anything if you lost one single account your multisig account is lost forever.
Generate
Once you have your wallets set up, you need to generate a multisig
account by clicking "Multisig" button 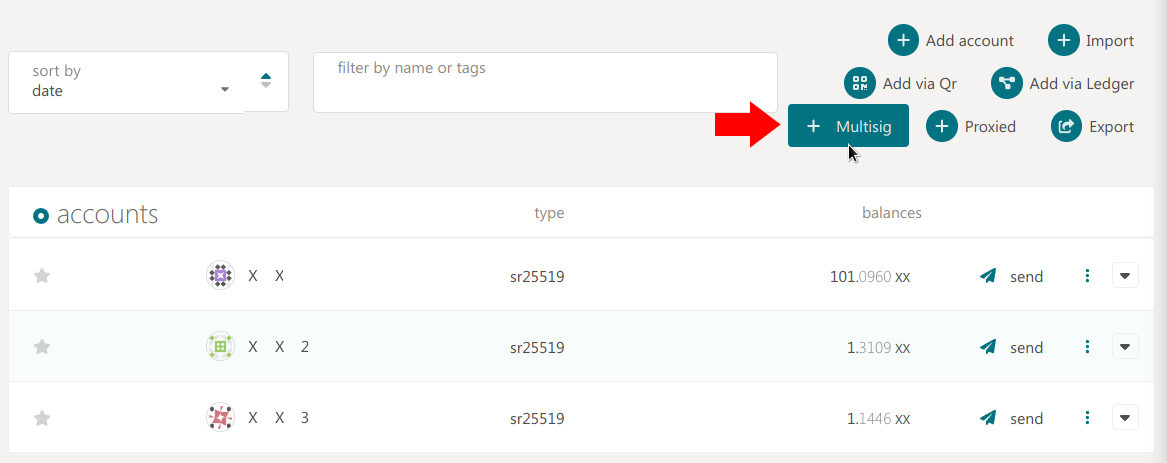
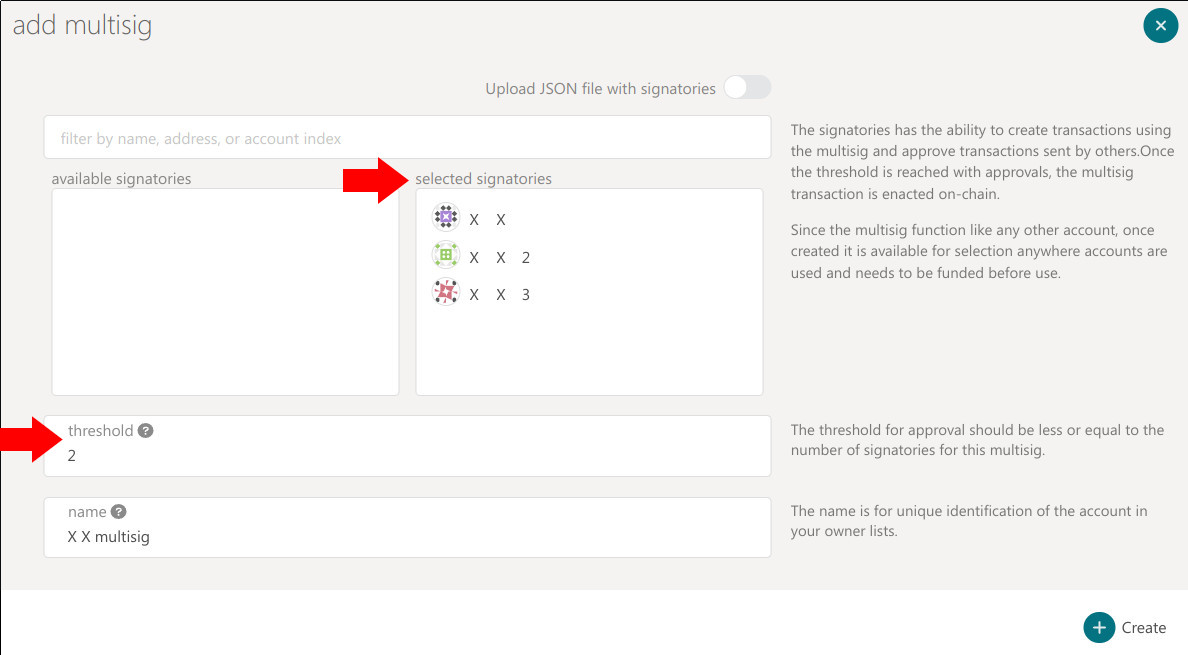
Select all accounts to create a multisig account and choose the
threshold number here 2 (threshold) of 3 wallets (selected signatories).
Export
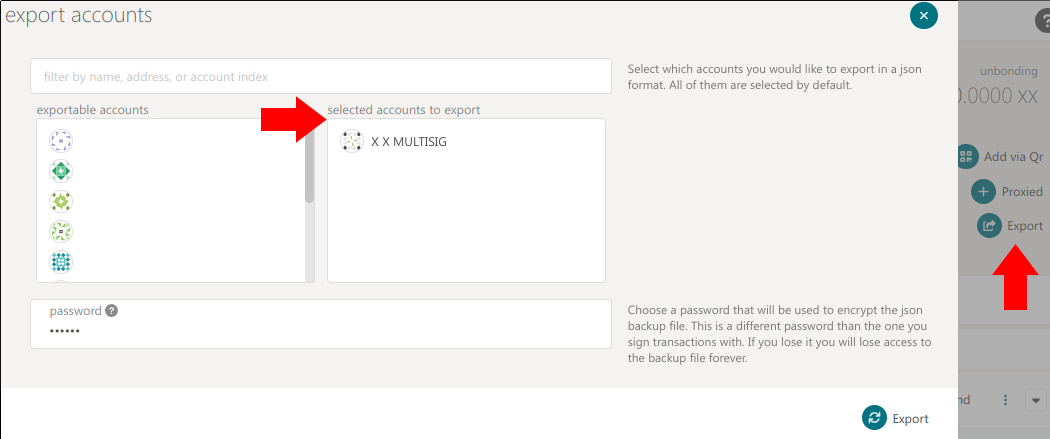
Multisig is a special account and xx wallet not execute a direct download like other account of the .json file. You have two possibilities to get your multisig account from wallet.xx.network :
- Import all accounts and click again on "Multisig" button to recreate same multisig account with exactly the same threshold number.
- You can click on the "Export" button and select only the multisig
account to export a .json file. The advantage is that you can import
only two accounts and the multisig account for signing transactions
if you choose 2 (threshold) of 3 (selected signatories) so you can
keep safe your last account safe on cold
storage.
Using multisig for validate
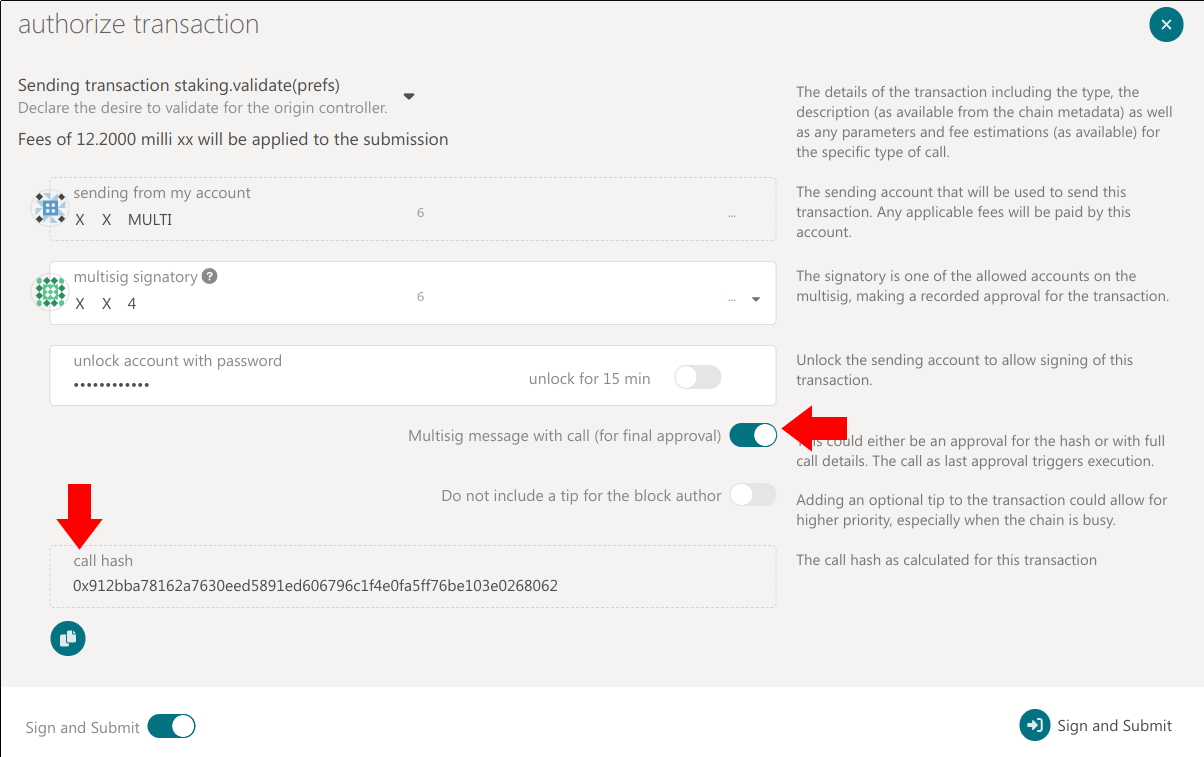
The first thing is to put some coins on each account for pay the fees but be careful because you need one account with more than 20xx!
This account with more than 20xx must be used first in the approval
process for sign the transaction : 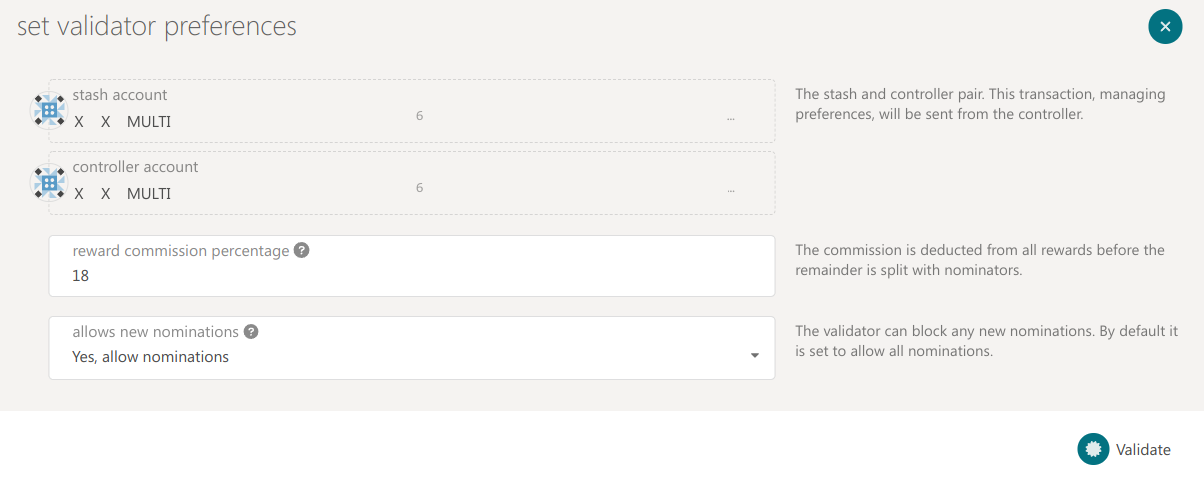
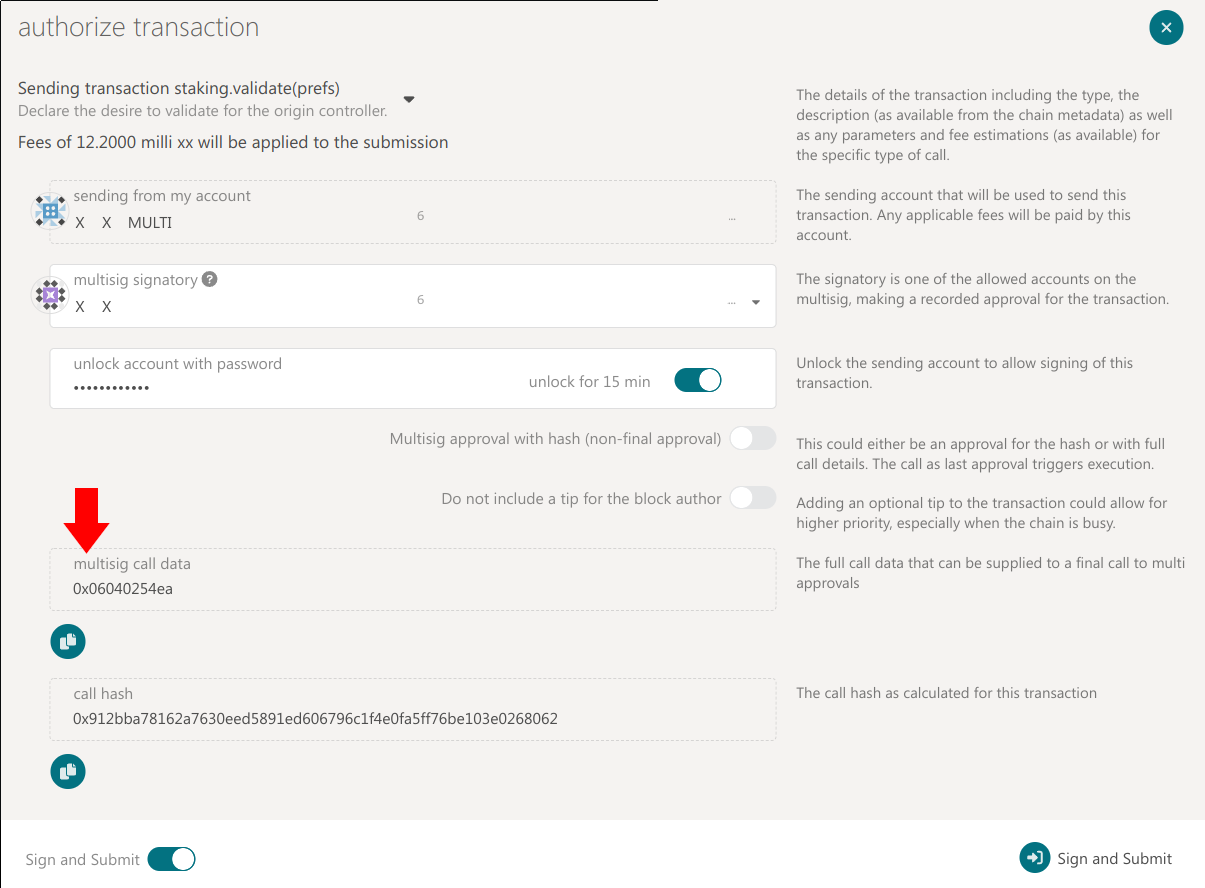
- Use an account with more than 20xx for sign the first approval
- It's better if you copy the "multisig call data" for the final approval
If you have enough coins over 20xx on the first account, you see it appear on the right of the screen
You now have two options to confirm all the necessary accounts :
1. Go to the "Accounts" tab and you should have a red mark on the left
side of your multisig because you need more accounts to sign the
transaction until you reach the threshold number for the final approval

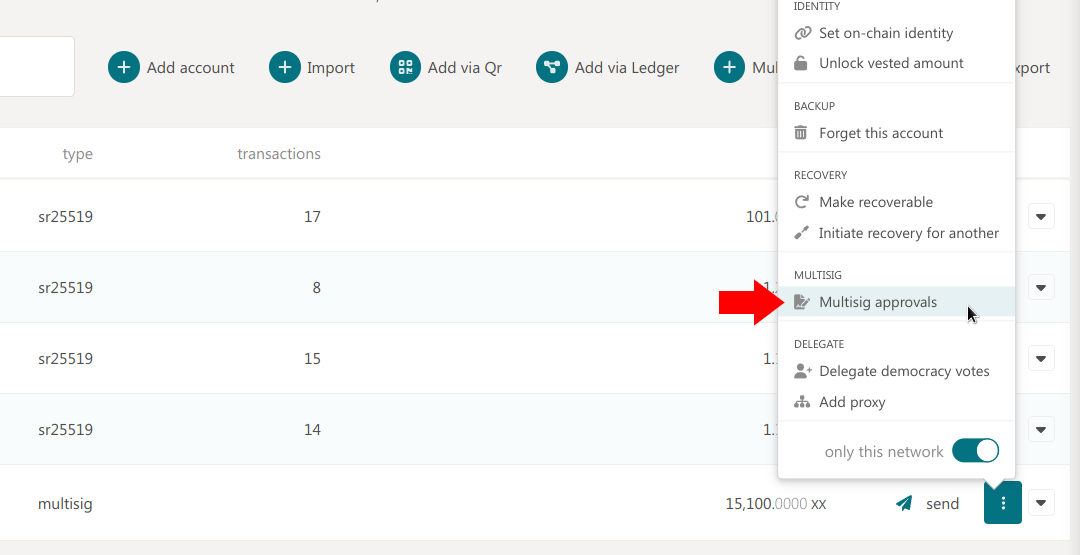
2. Perform the same actions with the same parameters and you will
arrive at this window until your reach the threshold number "Existing
approvals (1/3)"
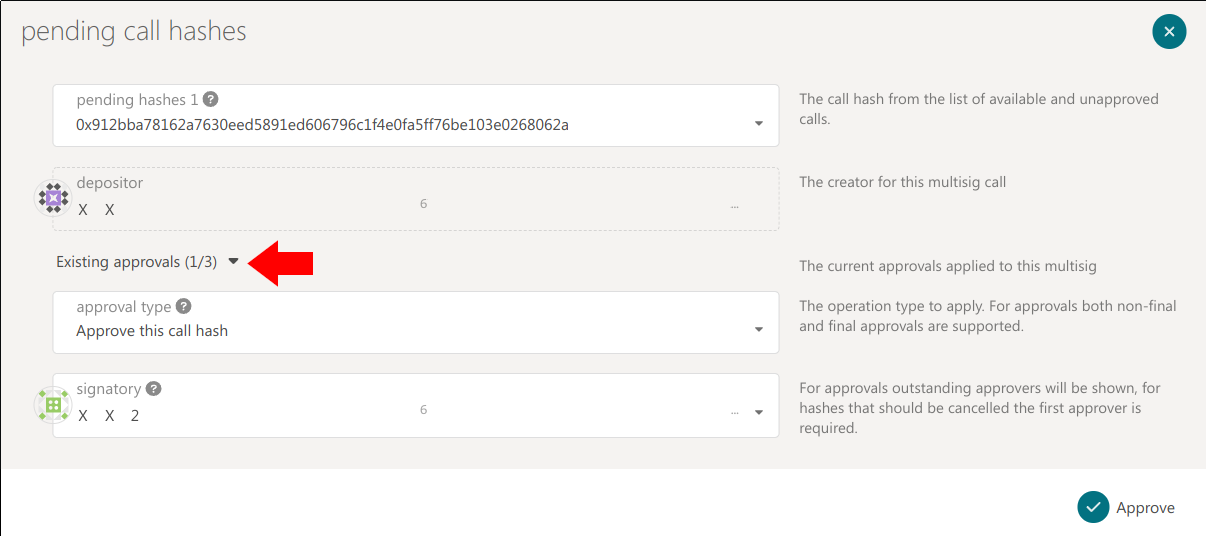 For the final approval your have also two choices :
- You have copied the "multisig call data" and by clicking on "Multisig approvals" from "Accounts" tab you come to this window and have to enter the "call data for final approval" copied during the first approval. The "Multisig message with call (for final approval)" ticks itself.
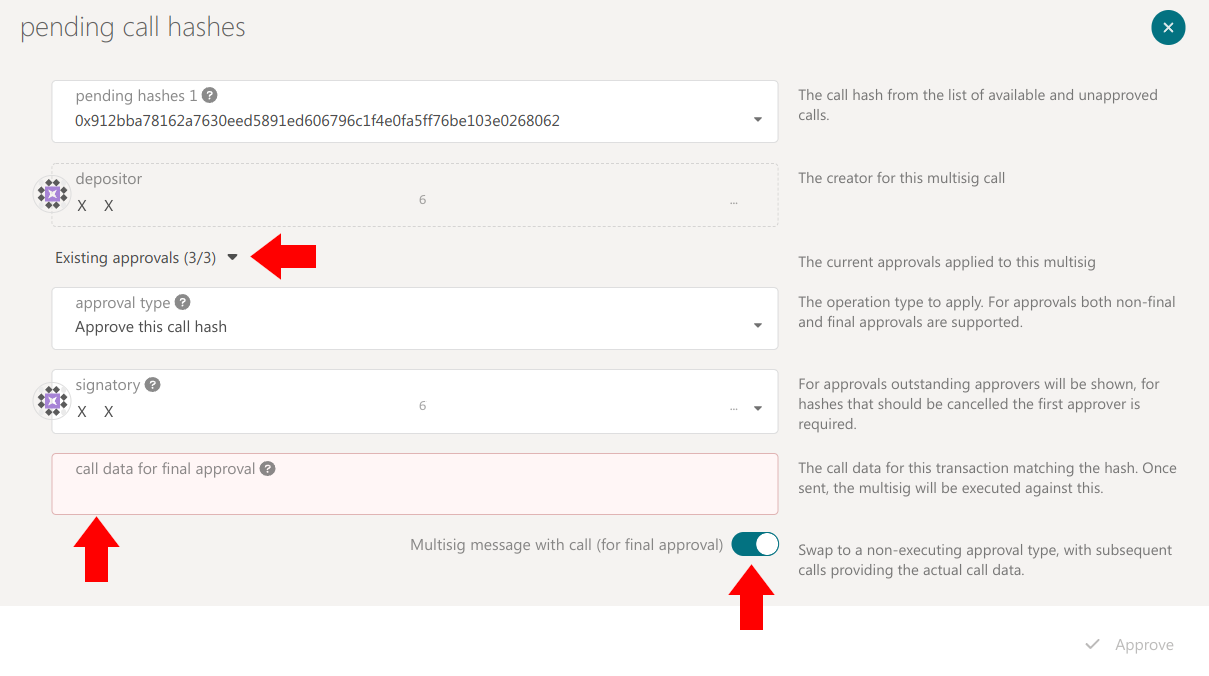 2. You haven't kept "multisig call data" and you have to do exactly the
same transaction with the same parameters. "Multisig message with call
(for final approval) is triggered by itself when your reach the
threshold number of signatures.
