Proxxy
Proxxy is a technology that leverages the xx Network's cMixx network to provide metadata protection to users of web3.
With Proxxy, any wallet can integrate better privacy, in order to avoid user's data being collected by RPC providers.
Currently, in order to use Proxxy, users have to install a desktop application, which will act as a local proxy to supported blockchain networks.
In principle, any wallet that supports adding custom networks will work with the Proxxy App, but for now MetaMask is the main wallet being targeted.
In the future, Proxxy technology will be made into an API that can be integrated directly in any wallet. However, this will always be dependent on developers of said wallets doing the integration, potentially in partnerships with the xx Network.
You can use Proxxy now by downloading the Desktop App, navigating to the Proxxy webpage, and following the connection flow.
Why is Proxxy needed?
Anytime a user interacts with a blockchain using a website or mobile wallet connecting to anything other than the RPC endpoint of a personally operated full node, it is leaking data that can be gathered.
This data might not be collected by RPC providers, but it can be. This lack of privacy has been known and acknowledged for a long time (Coindesk article) and remains one to this day with RPC providers:
"MetaMask must have an RPC provider to work, and an RPC provider must collect your IP and wallet address to work" 1
When a user connects to a public RPC endpoint, of any blockchain, the owner of that endpoint can see all the traffic coming and going.
Metadata such as IP address can be used to determine location, date & time can be used to find routines, and often more, such as tracking data from a browser that can be used to create social graphs, user profiles and personal information, etc (Understanding browser tracking).
The following image represents how user metadata is leaked to the RPC provider when using MetaMask.
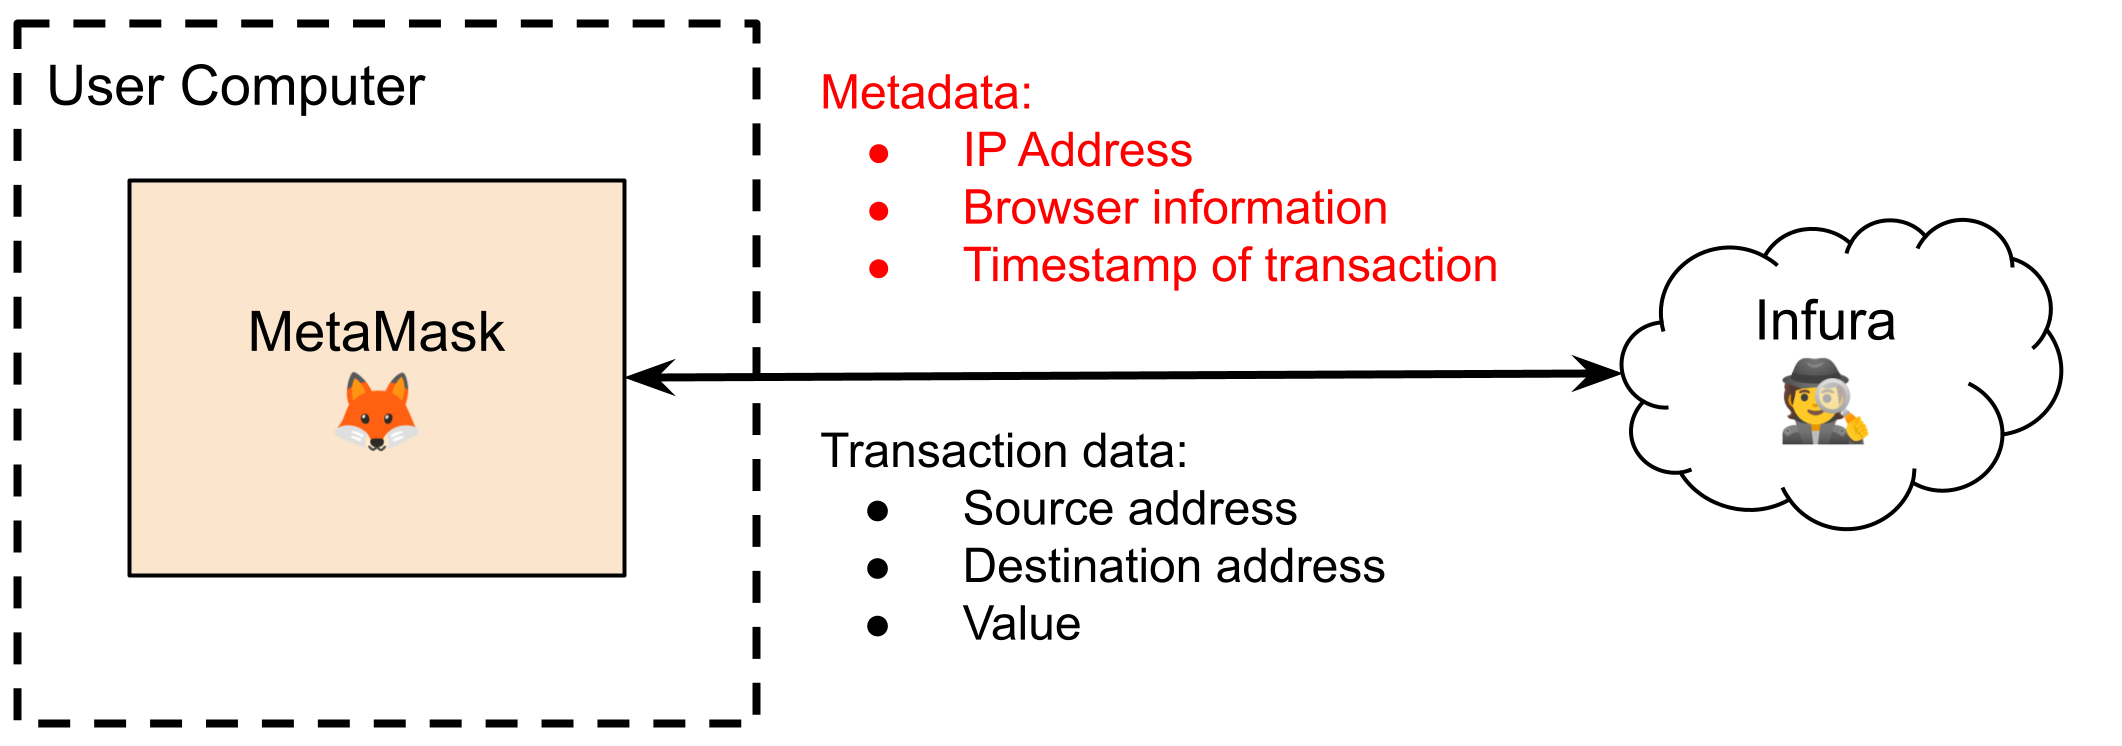
By collecting the metadata and transaction data, Infura can associate a source address of any transaction with information that might help identify the user, effectively breaking the pseudonymity provided by the blockchain.
With Proxxy, users are safe to interact with a public RPC endpoint, and their metadata and/or browser data does not end up in the possession of the company operating the RPC infrastructure.
How does Proxxy work?
Proxxy uses a pair of client / server applications that communicate over the cMixx network.
The client receives RPC requests from the wallet application interacting with a given blockchain and sends them over cMixx to the Relay server.
The Relay server then forwards the request to configured RPC endpoints according to the blockchain network the user is interacting with.
The RPC endpoint replies to the request and the Relay server then forwards it back to the client over x, which then responds back to the wallet application.
The source code for Proxxy client / server applications can be found here.
The Proxxy App wraps the client side application, so that the user is presented with a simple interface and experience, instead of requiring the use of a command line application.
The source code for the Proxxy App and Website can be found here.
The following image shows how user metadata is protected when using MetaMask with the Proxxy App.
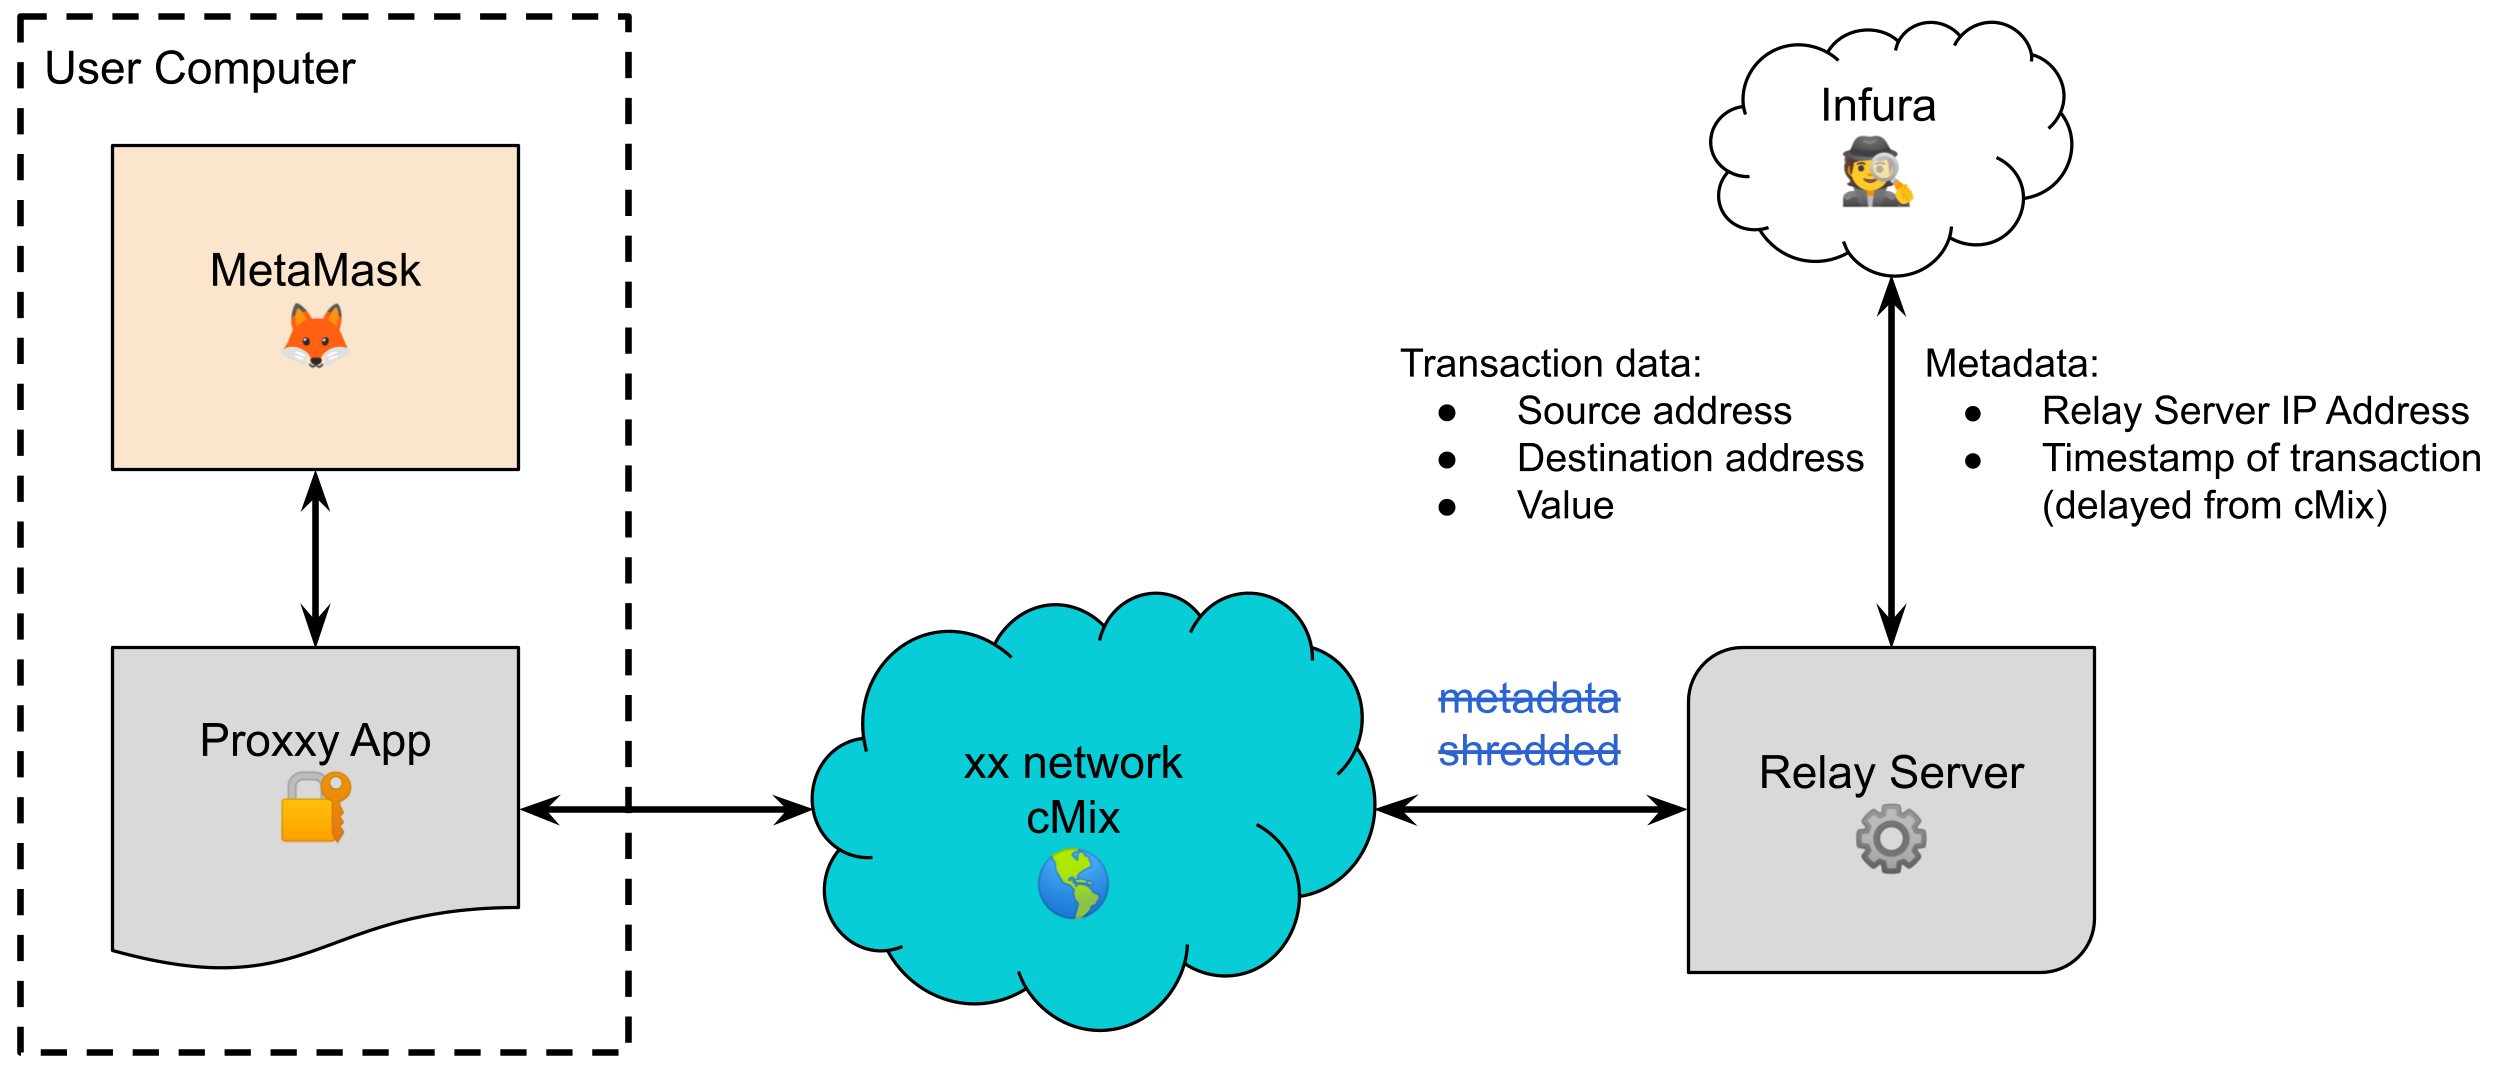
Infura can still collect metadata, but now this will always be information about the Relay Server, so there is no way to associate source addresses to user information, thus maintaining the pseudonymity properties provided by the blockchain.
How does the app contact a Relay Server?
The Proxxy App can contact any number of Relay Servers, and the only information required is the Relay server contact data, which is generated by the server when connecting to the cMixx network.
The xx Foundation maintains a file with the contact data of active Relay Servers.
It's important to note that even if the xx Foundation was malicious, and changed the contact information of the Relay Servers, user's metadata is STILL PROTECTED by cMixx. This can be seen in the image above, as the Relay Server can only pick up messages from the cMixx network, which have been stripped of all metadata.
In other words, malicious Relay Servers cannot gather user metadata over the cMixx network. This is a clear contrast to some privacy protecting technologies, which rely on a direct connection with a relay server. When a wallet does not use cMixx and directly connects to a relay server, a malicious relay server provider will be able to gather user metadata, the same as an RPC provider.
Supported Networks
Currently, the following networks are supported by Proxxy.
Mainnets:
- Ethereum
- Avalanche C-Chain
- Polygon
- Binance Smart Chain (also known as BSC or BNB)
- Astar
- Moonbeam
- Fantom
- Arbitrum (ETH L2)
- Optimism (ETH L2)
- Celo
- Aurora
- Shiden
- Moonriver
Testnets:
- Ethereum Goerli
- Ethereum Sepolia
- Avalanche Fuji C-Chain
- Polygon Mumbai
- Binance Smart Chain Testnet
- Fantom Testnet
- Celo Alfajores
- Aurora Testnet
Support for any more EVM based networks can be added easily on demand, via the xxfoundation canny page.
Metamask Recommendations
Before setting up Proxxy with MetaMask, it is recommended to disable multiple settings that reduce the user's privacy.
In order to disable these settings, open your MetaMask wallet, go to Settings -> Security & Privacy and disable the following:
- Show balance and token price checker
- Show incoming transactions
- Autodetect tokens
- Batch account balance requests
- Participate in MetaMetrics
Download and Install
The Proxxy app is available for Windows, Linux and Mac machines. Refer to the detailed instructions below for your operating system.
Windows Instructions.
-
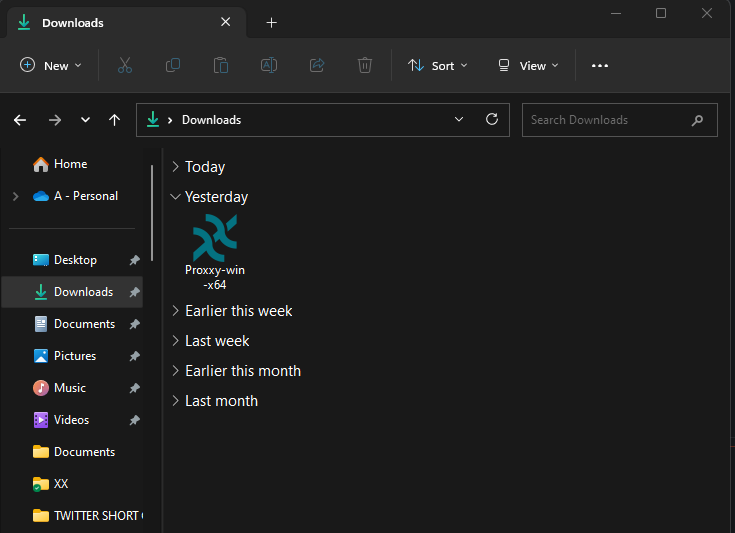
Download the Proxxy file for Windows here.
-
In the file browser, navigate to the folder where the application was downloaded to and double-click the file.
-
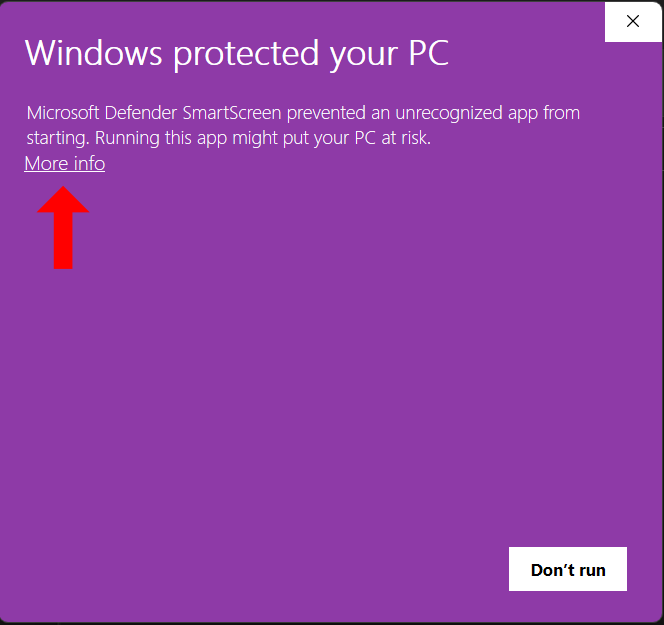
You may get a notice saying "Windows protected your PC" preventing you from running the program. This is common with newer applications that have not yet been registered with Windows OS. To get past the SmartScreen filter, click on the "More info" link.
-
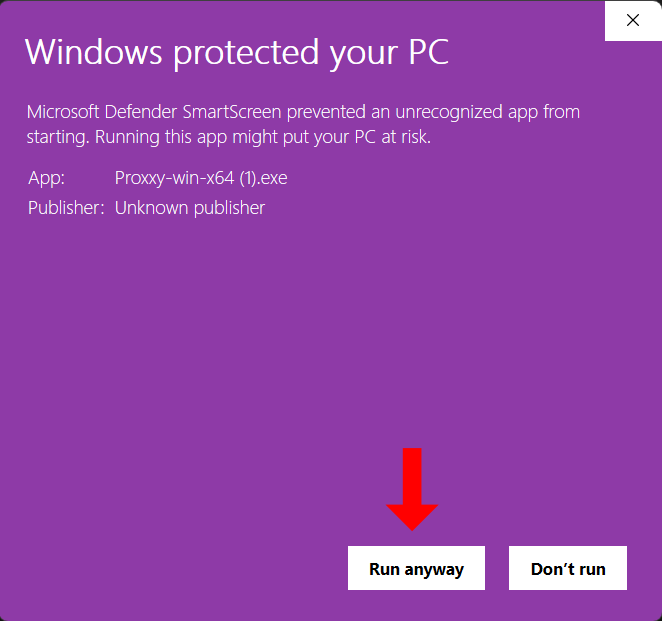
Next, click the Run anyway button and the setup will launch.
macOS Instructions.
- Download the binary for macOS and for your CPU architecture: x64 or arm64, which you can check on the "About This Mac" page. The Intel version (x64) will work on Apple Silicon devices (arm64) as well.
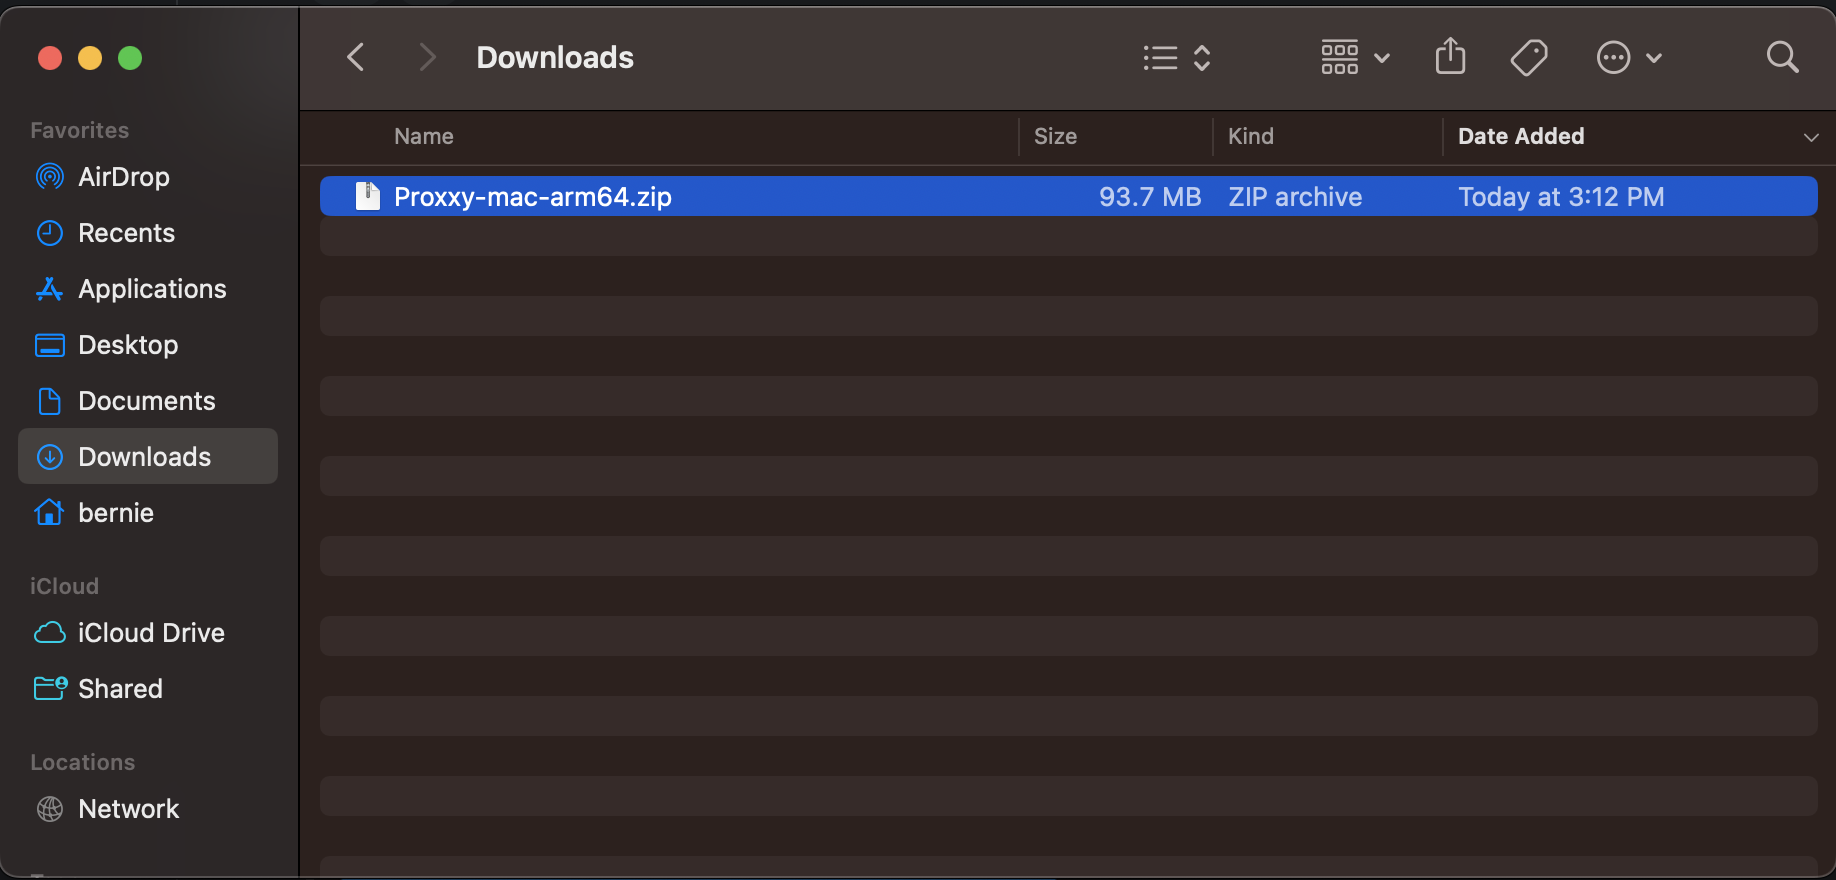
- Open the Finder, head to Downloads, and double click on the file to unzip the application.
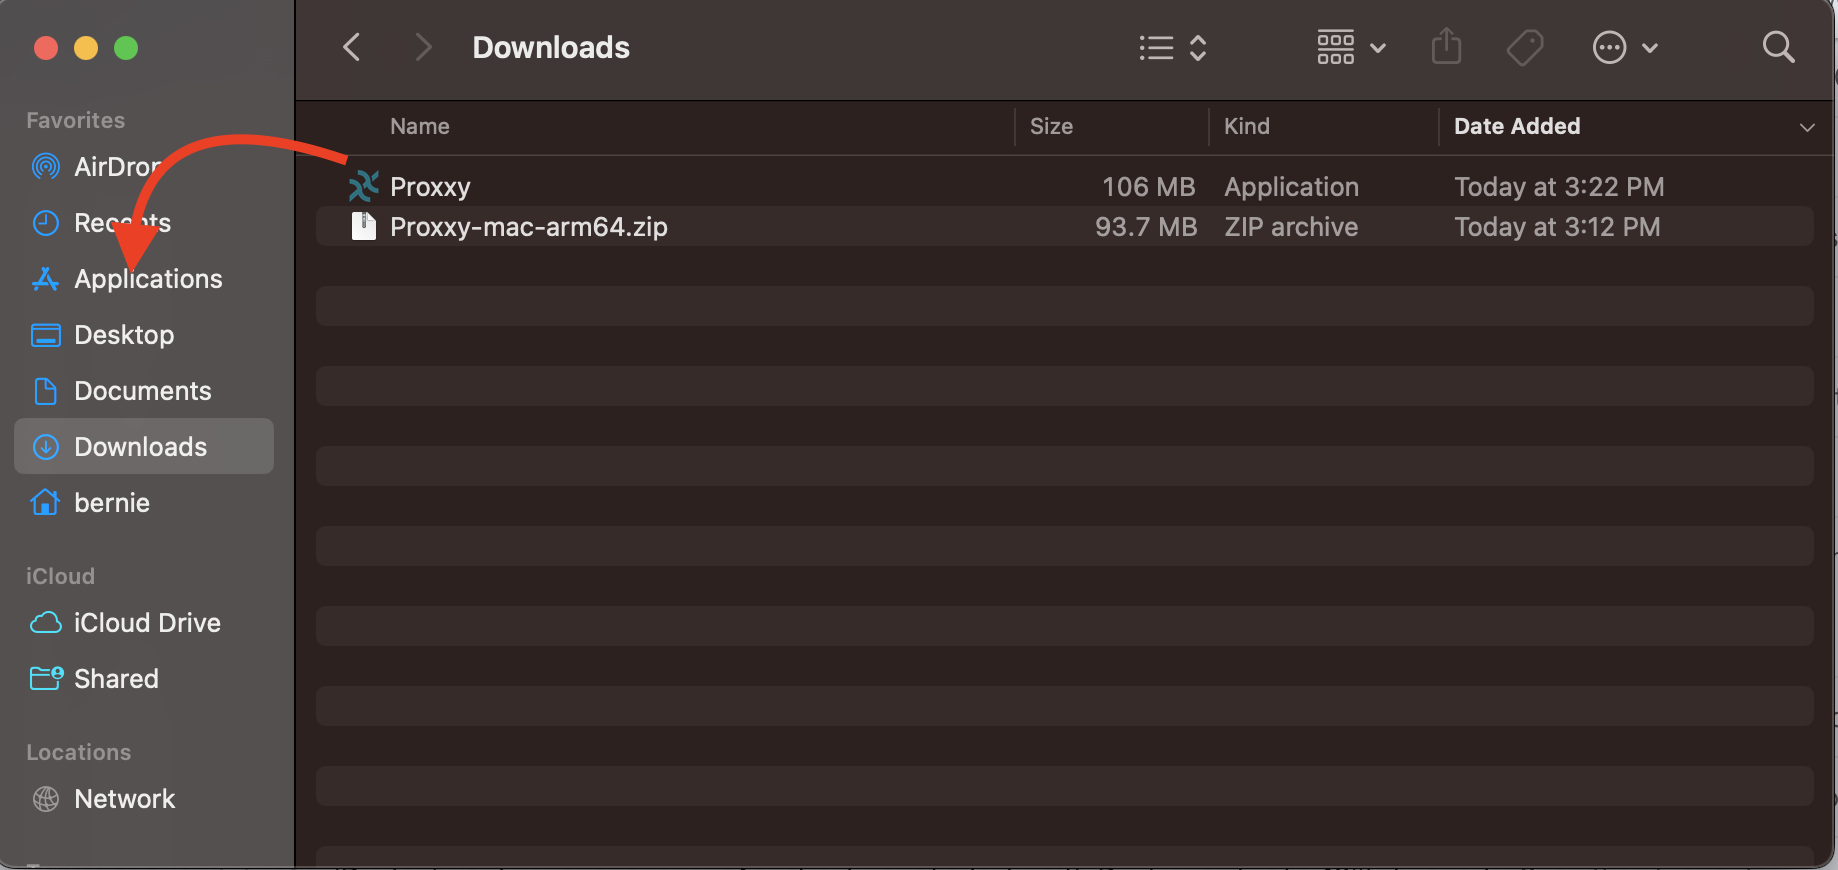
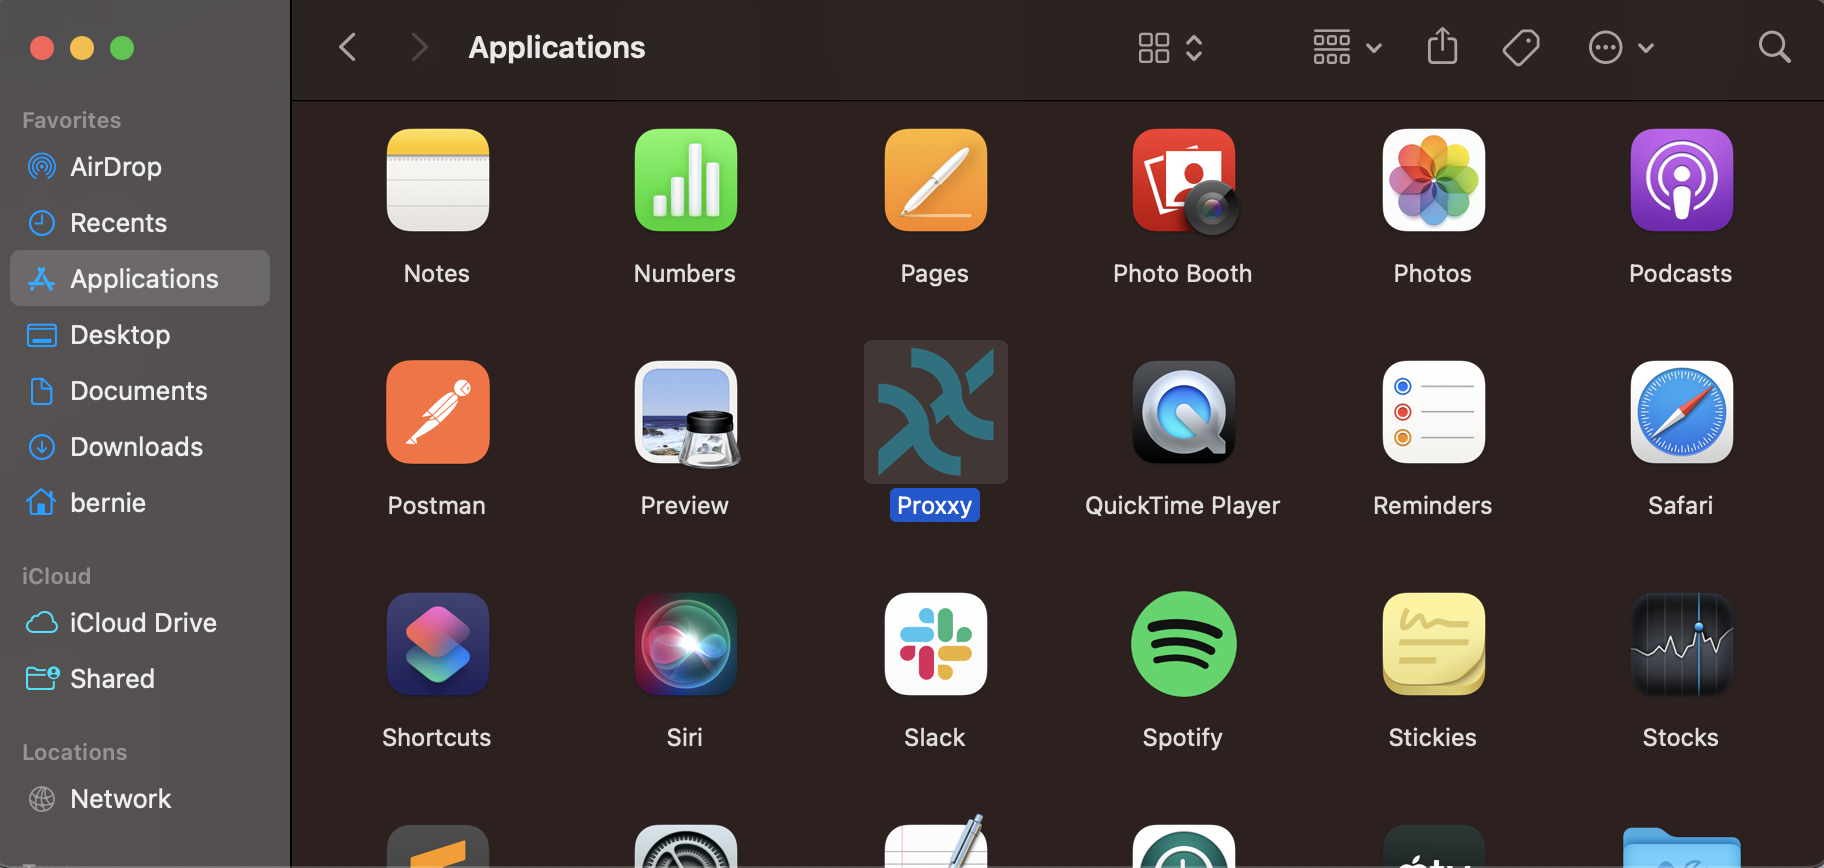
- Now that you have the Proxxy application unzipped, you can drag it to the Applications folder on the left side of the finder.
- Go to the Applications folder, find the Proxxy app in the application list, and double click to open.
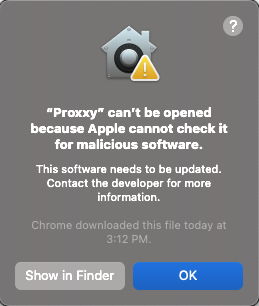
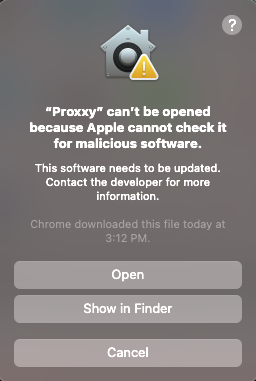
- A warning will appear saying that the developer cannot be
verified. Click the OK button. This warning might look
different on older macOS versions, which could have a
Cancel button. If so, press that button instead.
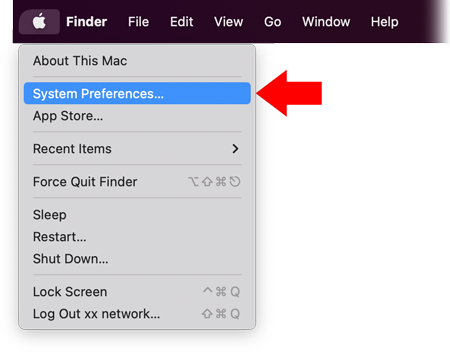
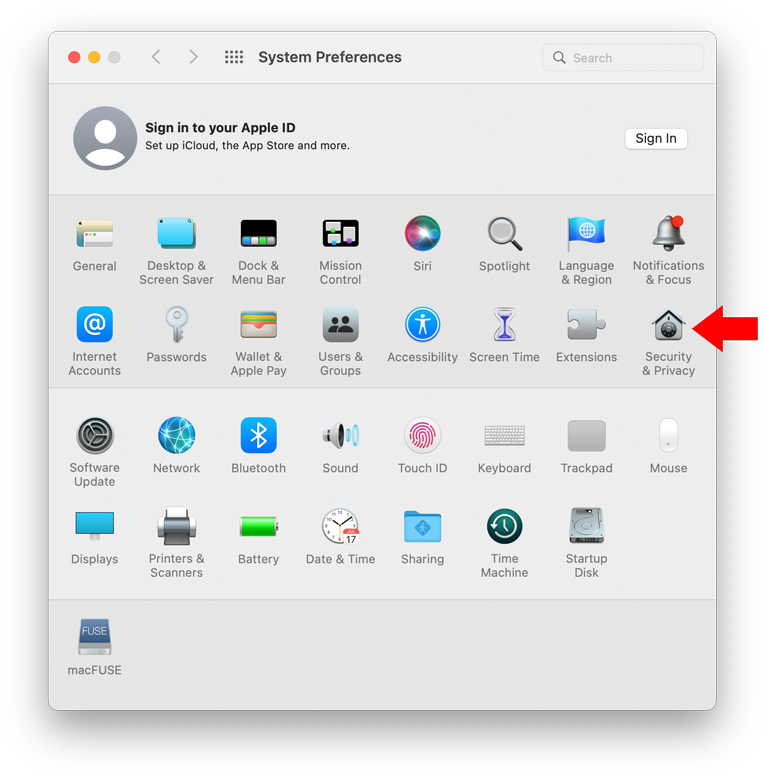
- Next, click on the Apple icon in the top left corner of your
screen in the menu bar. In the drop-down menu, select System
Preferences….
 If
your machine is running macOS Ventura (version 13 and up),
you should select "System Settings..."
instead.
If
your machine is running macOS Ventura (version 13 and up),
you should select "System Settings..."
instead.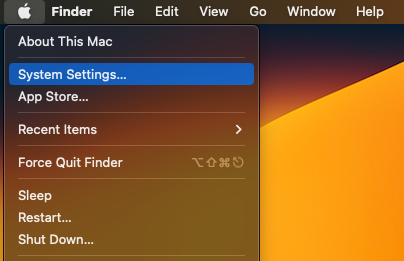
- The System Preferences window will show up. Click on
Security & Privacy.
 If
your machine is running macOS Ventura (version 13 and up),
the menu is now called "Privacy &
Security"
If
your machine is running macOS Ventura (version 13 and up),
the menu is now called "Privacy &
Security"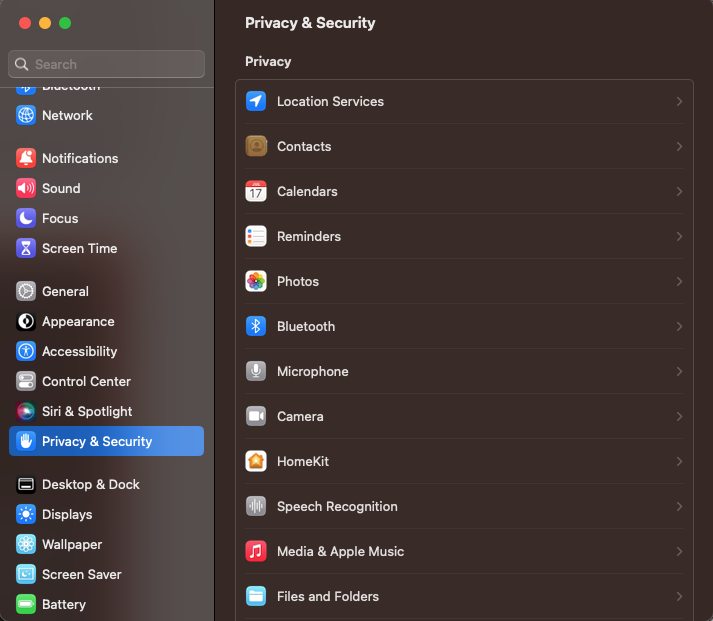
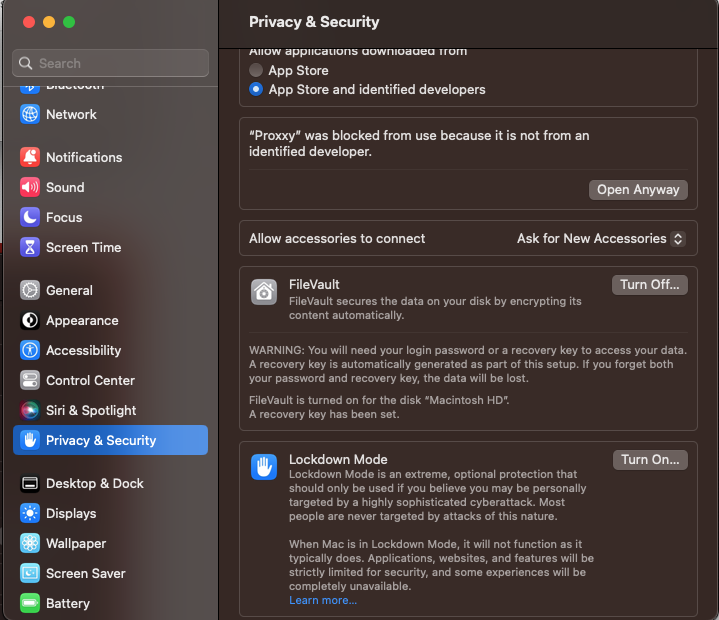
- Scroll down on the settings until you find a prompt where it says "Proxxy" was blocked…, click the Open Anyway button.
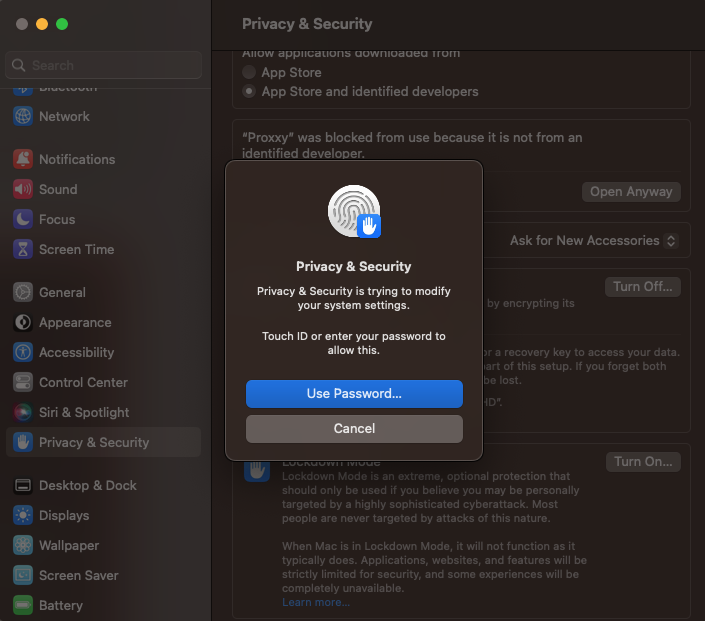
- You might be prompted to insert your password or use TouchID in order to confirm this action.
- In the window that opens, click the Open button and the
Proxxy app will launch.
- When launching the app for the first time after unblocking it in the Security settings in some machines, it will stay black and not load. If this happens, close the app and open it again. It should now work.
Linux instructions.
-
Download the file, according to your CPU architecture: x64 or arm64
-
Extract the binary.
-
Open the defualt file manager (Ex. Gnome/Files, KDE/Dolphin, etc.).
-
Browse to the location of the file.
-
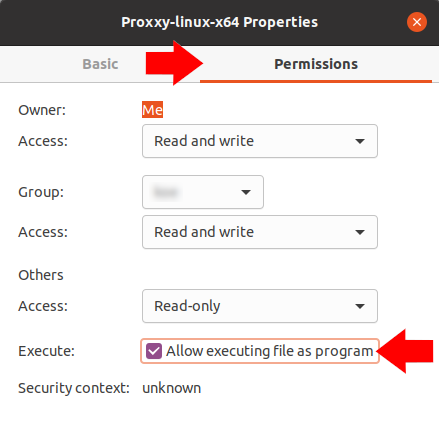
Right click the file and select "Properties".
-
A window will appear, (Example of Gnome/Files shown below) select the "Permissions" tab, check the "Execute: Allow executing file as program" box and close the window.
-
You can now launch the Proxxy application by double-clicking the file right from the file manager.
-
After the App launches, head back to the Proxxy webpage and follow the rest of the instructions.
-
If you are using the Brave browser, please note that you need to disable Brave Shield in order to be able to connect the proxxy webpage to the app.